

Picaditas Mexicanas hot off the griddle! Learn how to make those soft and delicious corn masa cakes topped with salsa, onions, and cheese.This traditional and mouthwatering snack is the perfect choice to whet your appetite.

What are picaditas?
Picaditas is a Mexican popular snack consisting of a thick corn tortilla with pinched sides cooked in a hot griddle and topped with salsa, onions, and cheese.
The name comes from the word picar which can be translated as ‘pinched’ due to the border made along the edges by pinching the dough.
Like many Mexican antojitos (snacks), the origin of this recipe goes back to pre-Hispanic times as corn was one of the main ingredients for daily recipes. It was prepared and consumed in drinks like atole, soups like pozole, or to make tortillas and sopes.
The recipe back then consisted of a masa cake topped only with chili sauce. With the conquest of Mexico, cheese, onions, and lard were added, giving birth to the modern-day recipe.

In central Mexico, this snack is available year-round in almost any street stall. They are a popular breakfast-on-the-run for folks on the way to work or school or as a quick lunch for busy people who will just stop for a few minutes, enjoy this snack, and keep going with their day.
Picaditas vs Sopes
More similar than different, these two Mexican street food are often called by natives by one or the other name interchangeably. But although they are similar, there are three important differences!
- First, sopes are always fried, while Picaditas are prepared on a comal or griddle with lard added on top only to give some flavor.
- Second, sopes may include various toppings such as meat, lettuce, beans, cream, etc. While the traditional picadas have only sauce, cheese and onion.
- And third, sopes are a little bit thicker than picadas, which are also larger, almost like a tortilla.
Related: How To Make Sopes From Scratch.
Variations
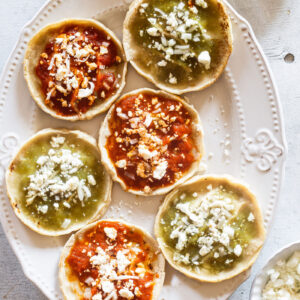
Veracruzanas or jarochas: One of the most popular recipes and the one we are sharing today. Normally, picaditas veracruzanas are made with two types of salsa. The red sauce is usually prepared only with tomatoes and onions while the green sauce is made with tomatillo and spicy green chilies.
Poblanas: Mexican picadas are also known as pellizcadas and topped with refried beans, salsa, onions, and cheese. Some variations are offered for meat-lovers such as adding shredded beef or beef marrow (delicious!).
From Acapulco: Being a fishing zone, in Acapulco you’ll find varieties of picadas that include fish or beans for the traditional toppings. It is common to find this variety at most seashore restaurants.
Ingredients
- MASA HARINA: The same used to make tortillas (nixtamalized corn flour). Find it at any Mexican food store, Amazon, or some local supermarkets in the international aisle.
- LARD: Buy the pork lard at a Mexican store or butcher shop, it is different in color and taste than the one you find in the supermarket. Otherwise sub pork lard with bacon fat for more flavor.
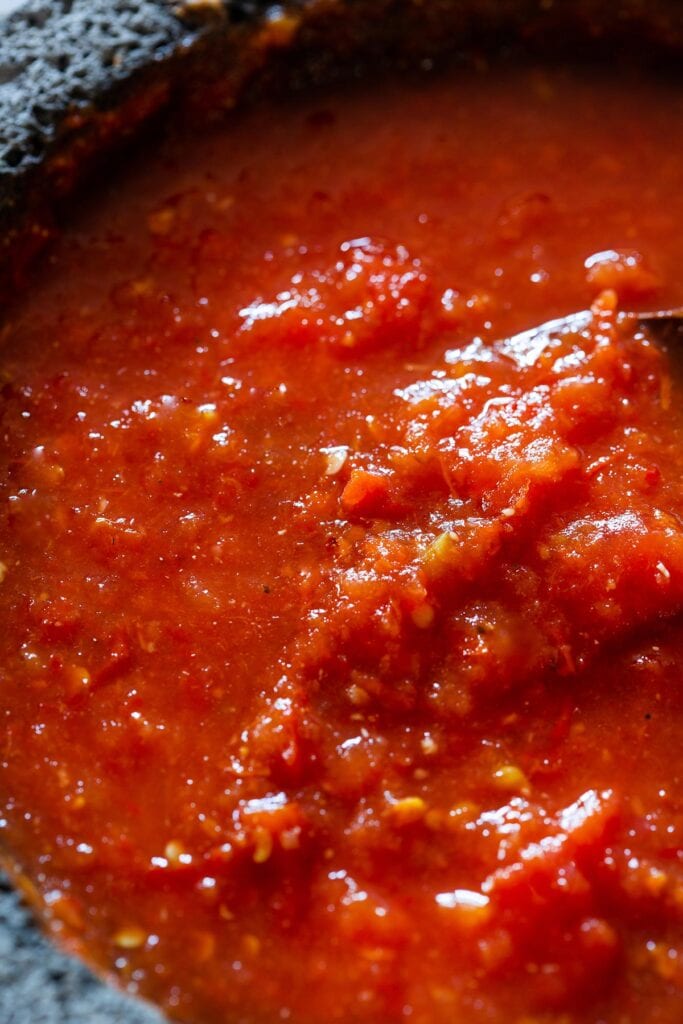
- SALSA: You can use a homemade salsa with any of the recipes we share below or your favorite brand of store-bought salsa.
- FRESH CHEESE: Use farmer’s cheese, for an authentic picadita recipe, we recommend queso fresco or Feta cheese.
- ONION: Chopped yellow, red, or white onions are a must.
How To Make Picaditas Veracruzanas
Before starting, make sure you make cut a plastic bag and make 2 sheets about 6×6 inches each (15x15cm).
Also, chop onions and crumble the cheese then place them in two bowls. Picaditas are best eaten just out of the pan, so set everything before starting.
Make the salsas
Decide which Mexican salsas you want to make, any of the following recipes are perfect to top this snack.
- Salsa verde – Made with tomatillos, green chilies, and cilantro.
- Tomatillo red chili: Made with chile de árbol, tomatillos, and onion.
- Chile de árbol salsa: With tomatoes and spicy chile de arbol peppers.
- Guajillo sauce: A red salsa prepared with guajillo chili peppers.

Make the dough
Combine masa harina, water, and salt in a medium bowl until a smooth and non-sticky dough forms. You might need a little more water or flour depending on the humidity in your kitchen.
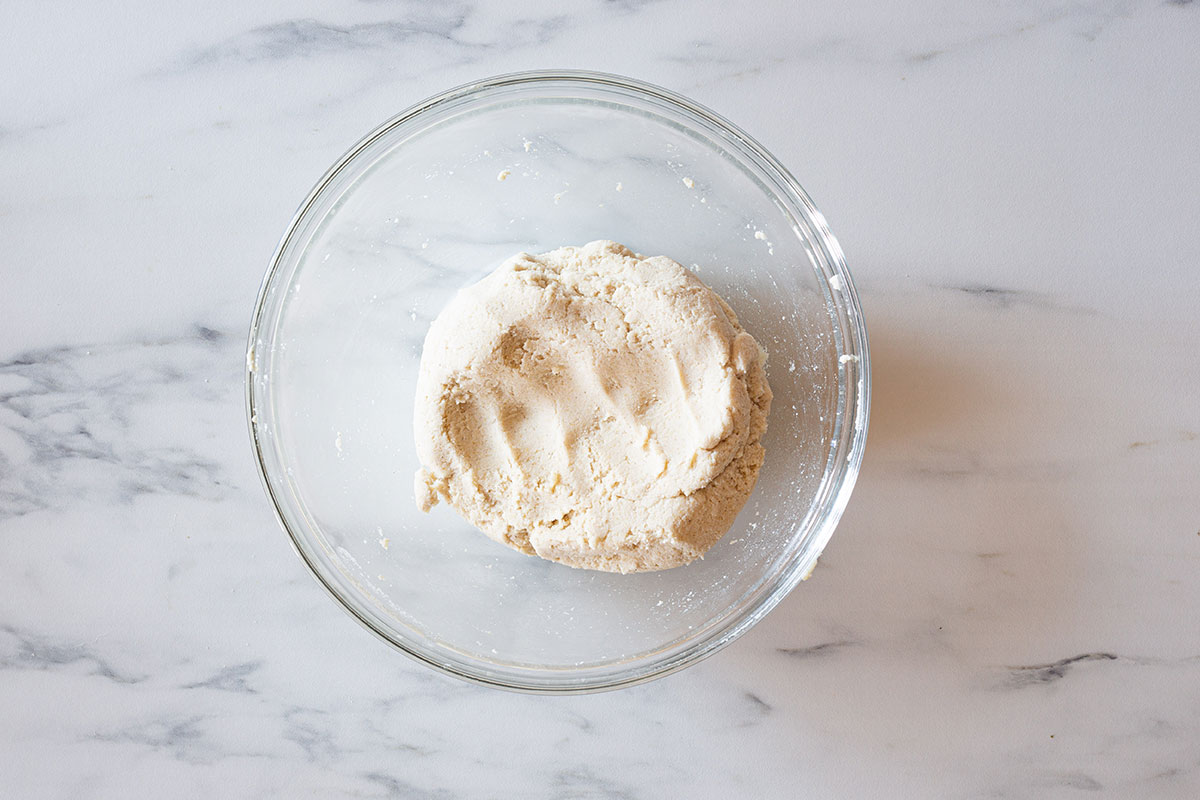
Divide the dough into 18 portions and roll them into balls. Cover them with a damp kitchen towel to prevent them from drying.
Make the masa cakes
Heat a cast-iron skillet or a coat over medium-high heat until smoky hot.
Now, you can use a tortilla press or a heavy dish to form the masa discs. Just place one ball in the middle of a plastic sheet then cover it with the other plastic sheet and press.
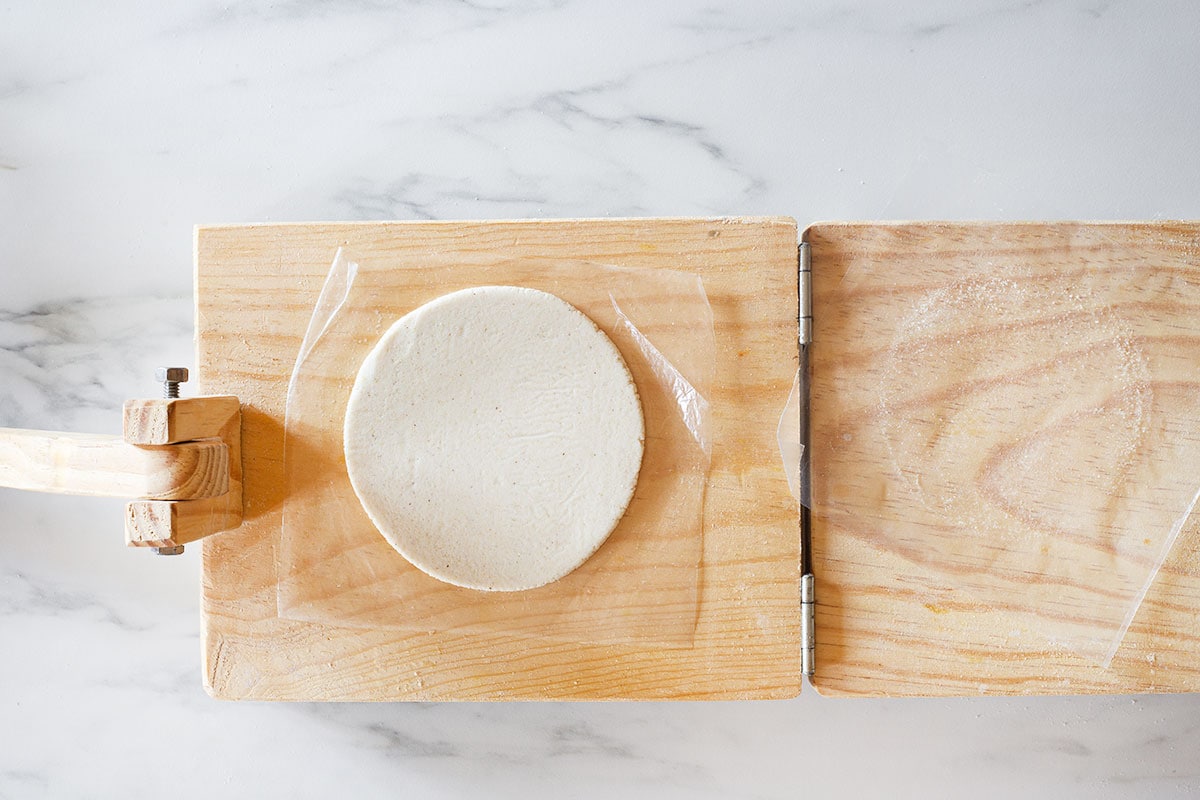
Don’t press too much or too little, it must be something between a tortilla and a sope. Each disc should have about 4,75-inch (12 cm) in circumference and be 1/4-inch (0,65cm) thick.

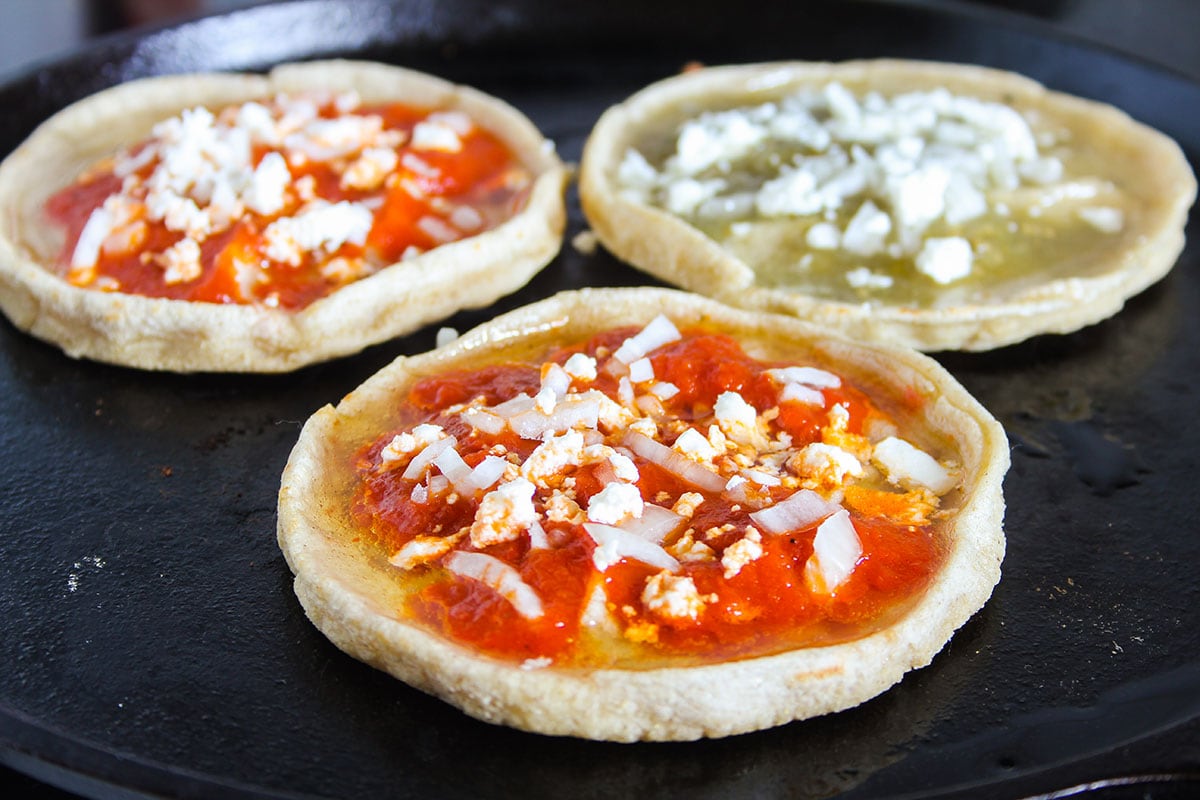
Carefully, remove the corn cake from the plastic sheets and place it on the hot skillet. Cook for about 1 minute then flip over and keep cooking for 2 more minutes flipping it one or two more times until brown spots form.
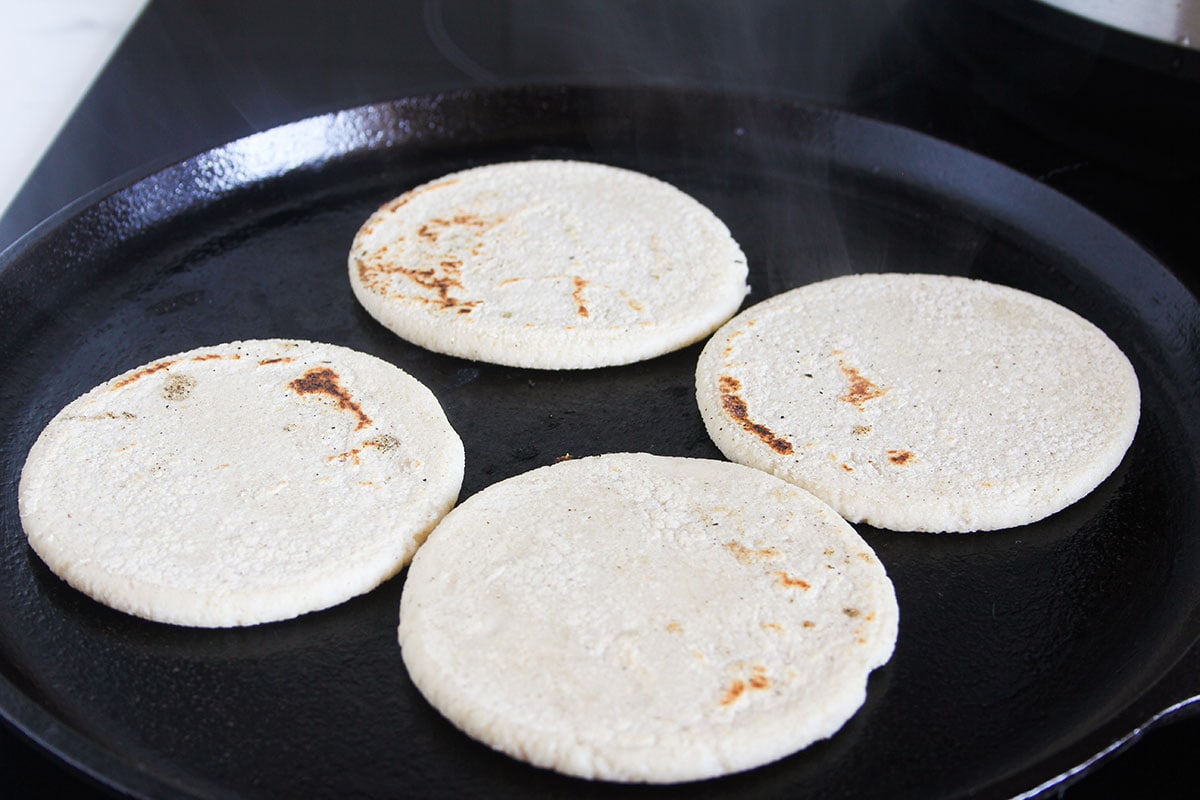
Place on a flat surface and immediately use a paper kitchen towel to pinch the edges and form a small ridge around the cake. Pinch in the middle to form some small barriers as well.

Keep making the masa cakes, cooking, and forming the border until all masa dough balls are used. As you make them, you’ll find it easier to make batches of 3-4 at a time and pinch them as the others are cooking on the skillet.
Keep them warm wrapped in a kitchen towel.
Cook, top and serve
Heat the lard or olive oil in a small pan and set aside.
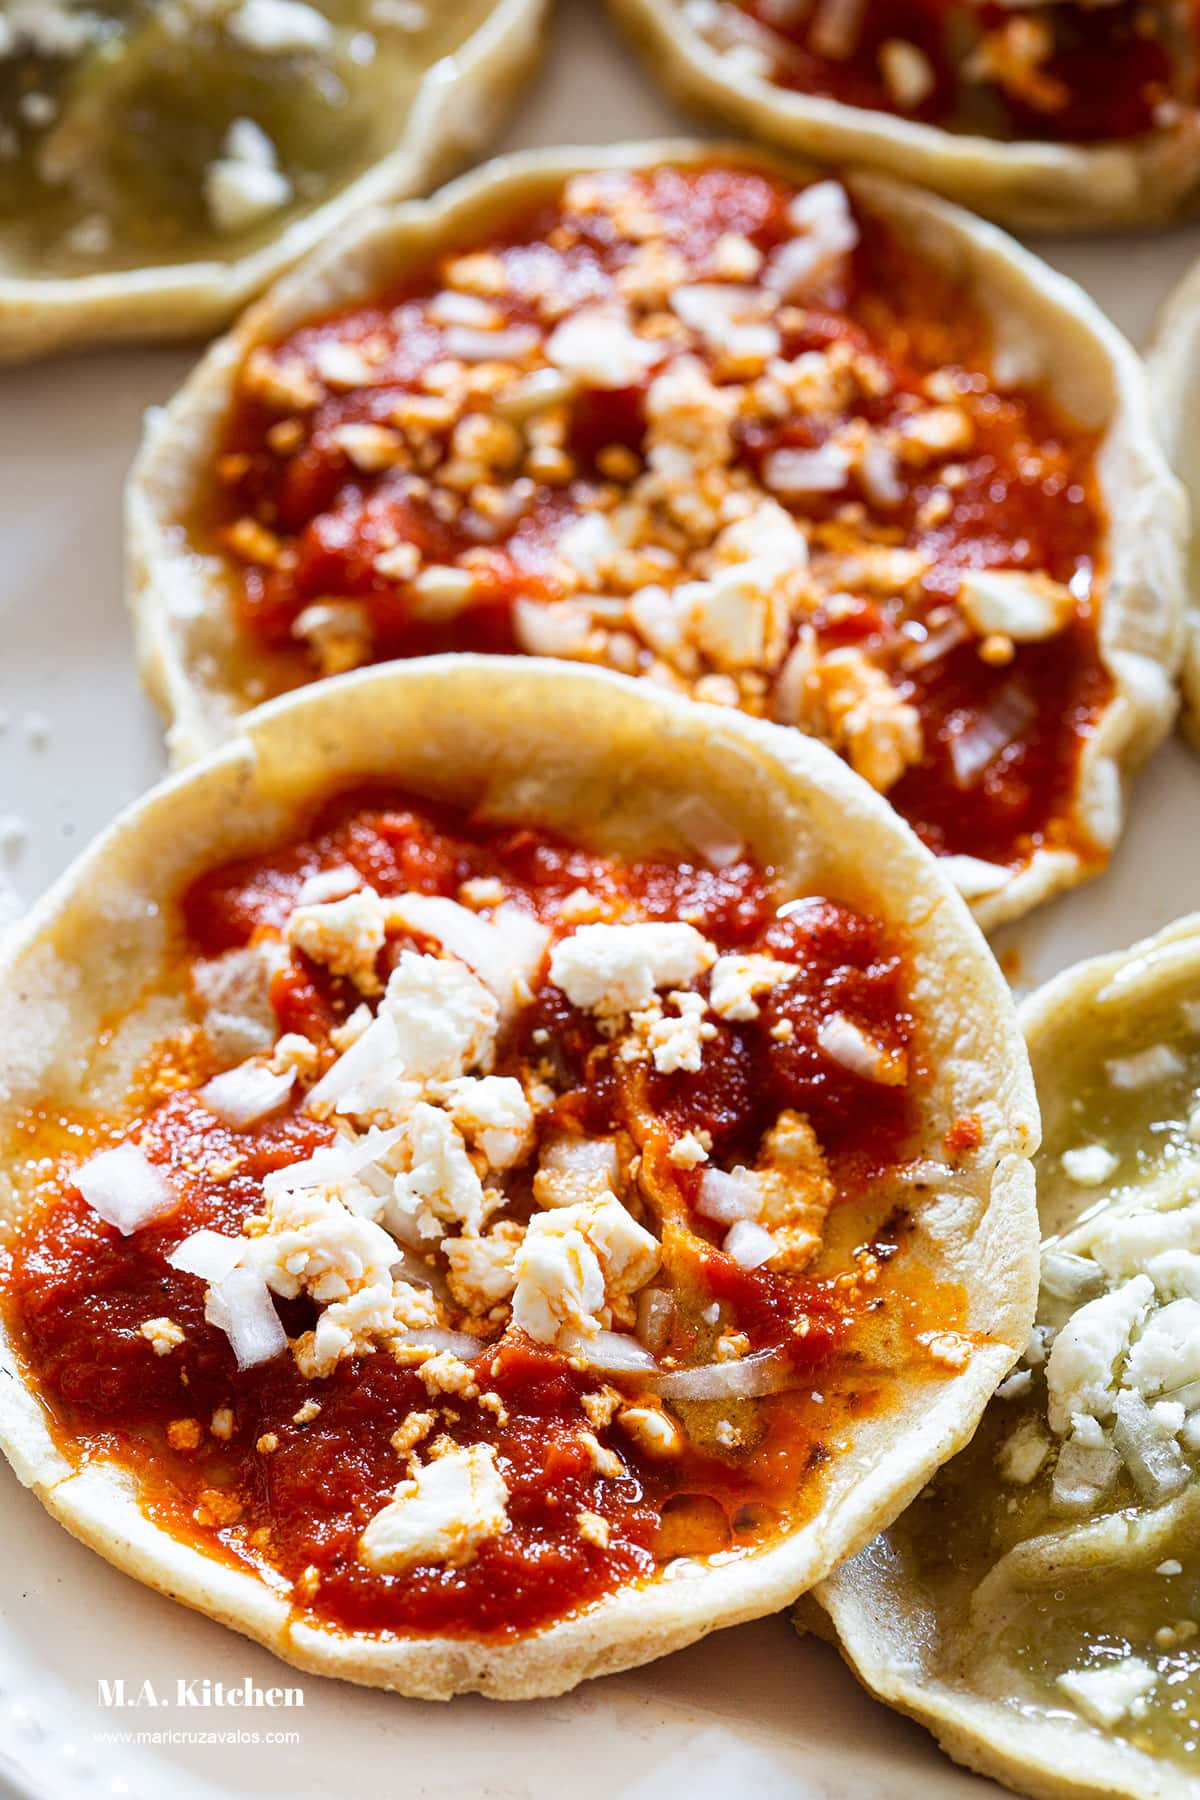
In a pan or the same skillet you used to cook the cakes, place a batch of picaditas and drizzle with some melted lard.

Add salsa, onions, and cheese on top and finish with another drizzle of lard. Cook for a couple of minutes just to warm up everything.
Remove the picaditas from the skillet and enjoy immediately with your favorite drink, we recommend this agua de tamarindo!
Store & Reheat
Those picadas Veracruzanas taste better just freshly made, but if you want to serve them at a party or make a large batch for a family dinner, check out our recommendations:
- Start with the salsas. Store in the fridge in an airtight container for up to 5 days or freeze them for up to 3 months. Thaw and allow to come to room temperature before using.
- Make the masa cakes up to 3 days ahead. Allow to cool down then wrap them tigtly with cling film and store in the fridge. You may need to slightly fry them to warm them up before adding the toppings.
- Got some leftovers? Heat a bit of lard or oil in a pan and heat up the Mexican picadas for a couple o minutes.
Similar Recipes
Try any of our easy and authentic Mexican snacks and let us know what did you like most!
- Chicken sopes. A thick tortilla topped with shredded chicken, lettuce, salsa, cheese, and cream.
- Tlacoyos. Corn pockets stuffed with black beans.
- Huitlacoche Quesadilla. Filled with Mexican corn truffles.
- Pambazos. Sandwich dipped in guajillo sauce and stuffed with chorizo and potatoes.
Picaditas Veracruzanas
Ingredients
- 2 ½ cups of masa harina
- 1 ½ cup of water (adjust if needed)
- 1 tsp salt
- 1 ½ cup guajillo salsa
- 1 ½ cup salsa verde
- 1 ½ cup queso fresco or your favorite cheese (crumbled)
- ⅔ cup onions (chopped)
- ½ cup melted pork lard (or bacon fat)
Instructions
Make the dough
- Combine masa harina, water, and salt in a medium bowl until a smooth and non-sticky dough forms.
- Divide the dough into 20 portions and roll them into balls.
- Cover them with a damp kitchen towel to prevent them from drying.
Make the masa cakes
- Heat a skillet or a coat over medium-high heat until smoky hot.
- Use a tortilla press or a heavy dish to press a masa ball between the two sheets of plastic until a thick disc forms (read notes).
- Carefully, remove the corn cake from the plastic sheets and place it on the hot skillet.
- Cook for about 1 minute then flip over and keep cooking for 2 more minutes flipping it one or two more times until brown spots form.
- Place on a flat surface and immediately use a paper kitchen towel to pinch the edges and form a small ridge around the cake then pinch in the middle to form some small barriers as well.
- Keep making the masa cakes in batches of 3-4, cooking, and forming the border until all masa dough balls are used.
- Wrap them in a kitchen towel to keep them warm.
Cook, top and serve
- Heat the lard or olive oil in a small pan and set aside.
- In a pan or the same skillet you used to cook the cakes, place a batch of picaditas and drizzle a little bit of melted lard.
- Add salsa (one type on each picadita), onions, and cheese on top, and finish with another drizzle of lard.
- Cook for a couple of minutes just to warm up everything.
- Remove the picaditas from the skillet and enjoy.
Notes
- When forming the masa cakes, each one should have about 4,75-inch (12 cm) in circumference and be 1/4-inch (0,65cm) thick.
Nutrition Information
If you liked this Mexican Picadas Veracruzanas recipe, please don’t forget to leave a comment and rate it below. Remember that you can also follow this blog on PINTEREST, INSTAGRAM, FACEBOOK, and YOUTUBE.
Picaditas is my kids’ favorite snack! They resemble pizza and they taste so good as well. Ever since I tried your recipe, they request it from me every weekend. We add lots of cheese to ours!