

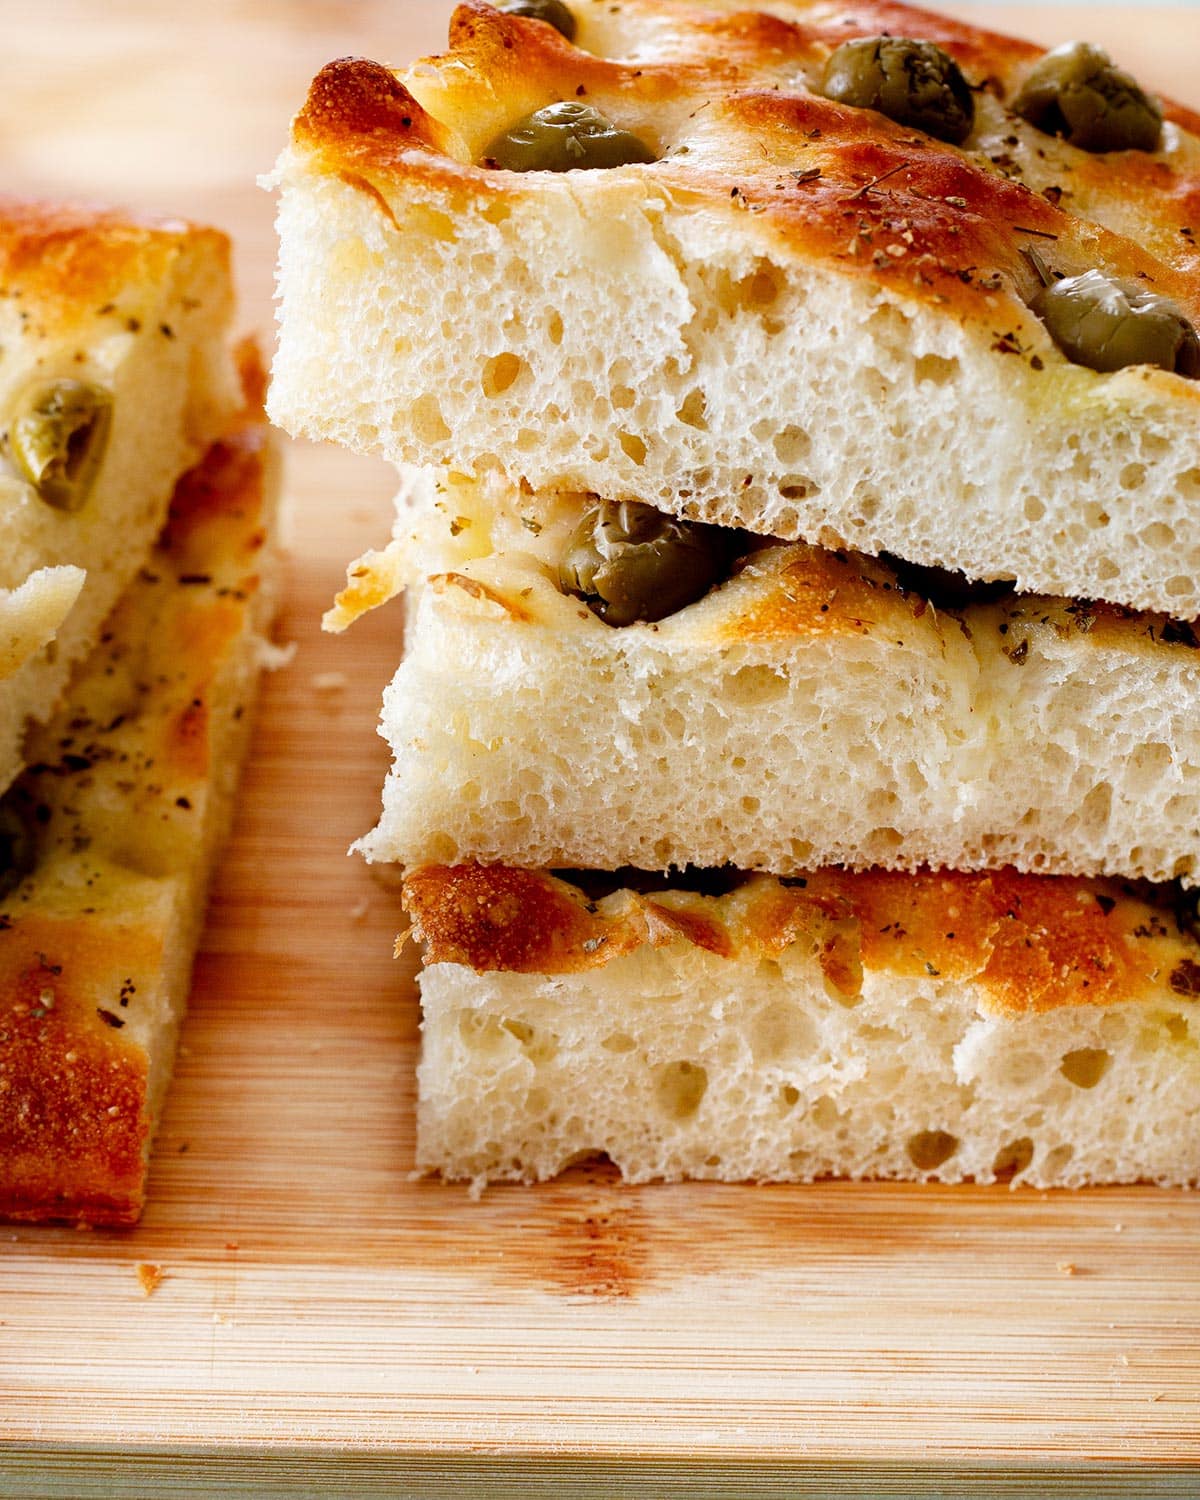
This focaccia con le olive has an amazingly soft and fluffy texture that will remain like that for days after baked. It also has a nice crunchy bottom making it a perfect accompaniment to any meal or a delightful snack on its own.

Just like my Ligurian focaccia, this focaccia con le olive is a staple at my home and I make it often because the recipe never fails!
The combination of olives with the airy, chewy texture of focaccia dough creates a harmony of flavors—salty, briny olives perfectly complement the mild, yeasty bread!
I’m here to share some helpful tips to ensure your recipe turns out perfectly. Take a moment to read through thoroughly as I’ll cover essential points, such as allowing for a longer proofing time and utilizing your oven to assist the dough in rising properly.
Ingredients
- Flour: Use a strong flour with 11%-13% protein.
- Potato flakes: This gives your focaccia con le olive that extra soft touch! They are the same potato flakes that are used to make instant mashed potatoes.
- Oil: Use extra virgin olive oil for the best flavor.
- Yeast: I am using active dry yeast. You can substitute with instant dry yeast.
- Honey: This will help to proof the dough quickly, you can substitute with sugar in a pinch.
- Salt: Use fine table salt.
- Water: Room-temperature water works perfectly.
- Olives: Use pitted green olives or your favorite type.
How to Make Focaccia con le Olive
Step 1. Make the starter
Place 1 cup (230ml) water, yeast, honey, and 1 cup (120g) of flour in a medium bowl. Mix to combine until a runny batter forms.

Cover the bowl with plastic wrap and let it sit for about 2 hours in a warm environment.

Step 2. Make the dough & proof
Add a little less than half a cup of water (100ml) to a glass and mix 1/2 tablespoon of salt until dissolved. Set aside.
Add the oil, potato flakes, and the remaining flour to the bowl with the starter, then pour the water with salt.
Mix the ingredients until combined using a spatula, adding the remaining water if the dough is too dry.

Place the dough on a work surface and flour it lightly, knead for 2-3 minutes, just enough to make an elastic and soft dough that will stick a little to your hands.
Form a ball and place it inside a bowl previously greased with some oil.

Cover the bowl with plastic wrap and let it rest in a warm environment for 2 hours or until doubled in size.

Step 3. Shape the focaccia & proof
Sprinkle a small amount of flour on your work surface and transfer the dough there.
Gently fold the edges of the dough towards the center, then fold the top and bottom edges towards the center as well. This folding technique creates layers within the dough and helps develop its structure.

Lightly grease a baking tray of about 8,5 x 12,5 inches (22×32 cm) and place the dough on it.
Gently press and flatten the dough with your hands until almost all the tray bottom is covered. Cover with plastic wrap and let the dough rest for 1 hour in a warm place.

Step 4. Prep
While the dough is resting, place 1/4 (60ml) water in a glass. Add 1 teaspoon of salt and 1 tablespoon of olive oil. Mix to combine and set aside.
Drain the olives and place them in a bowl. Set aside.

30 minutes before the focaccia finish the last proofing time, preheat the oven to 440°F (225°C).
Step 5. Finish and bake
After the last proofing, you’ll notice that the dough has expanded reaching the borders of the baking tray.

Now, using your fingertips make the classic little dimples on the focaccia. If you’re afraid of ripping the dough, use your knuckles instead.
Tip: Flour lightly your fingers to prevent the dough from sticking to your hands.

Pour the brine all over the surface. Distribute the olives on top and sprinkle with dried oregano.

Bake for 15-18 minutes or until the top turns a lovely golden brown color. To check if it’s done, gently lift a corner with a knife—if the bottom feels dry and crunchy, it’s ready.

Tips and Notes For Fluffy Focaccia
- For best results, use a kitchen scale to measure the ingredients. Weighing flour and water provides accuracy, ensuring the ideal dough consistency.
- This focaccia con le olive uses a small amount of yeast, thus it needs long proofing times. Is not one of those quick-and-fast breads. Be a little patient, the result is worth the waiting time, your focaccia will be more fluffy and fragrant!
- To proof your dough when it’s cold, use your oven as a proofing box. Turn on the oven light about 30 minutes before making the dough. Then, place the bowl with the dough inside the oven—keep the oven off. The gentle warmth from the light will help the dough rise.

How to Store
Focaccia con le olive can be stored to eat throughout the week. Allow the bread to cool down completely and then wrap it with plastic wrap to keep it soft or store it in an airtight container.
When ready to enjoy, you can eat it as it is or reheat it for a few minutes in the oven at 375°F (190°C) or in a skillet on the stovetop, it will make the bottom of focaccia con le olive crunchy again.
More Bread Recipes


Loved my focaccia con le olive recipe? Then please take a minute and rate it below in the comments. Also, don’t forget to share and follow this blog on Instagram, Facebook, Pinterest, and YouTube.
Video
Print the Recipe

Focaccia con le Olive
Equipment
- 8,5 x 12,5 inches baking tray (22×32 cm)
Ingredients
- 2 ½ cups bread flour (with 11%-13% protein)
- 5 Tablespoons potato flakes
- 1 ½ cups water
- 3 teaspoons extra virgin olive oil
- 1 teaspoon active dry yeast (or 8.5 gr fresh yeast)
- 1 teaspoon honey
- ½ Tablespoon salt
- ⅔ cup pitted green olives
For the brine
- ¼ cup water
- 1 teaspoon salt
- 1 Tablespoon extra virgin olive oil
Instructions
Make the starter
- Place 1 cup of water, yeast, honey, and 1 cup of flour in a medium bowl. Mix until combined.
- Cover the bowl with plastic wrap and let it sit for 2 hours in a warm environment.
Make the dough and proof
- Add a little less than half a cup of water to a glass and mix the salt until dissolved. Set aside.
- Add the oil, potato flakes, and the remaining flour to the bowl with the starter, then pour the water with salt.
- Using a spatula, mix the ingredients until combined, adding the remaining water if the dough is too dry.
- Place the dough on a floured working surface and knead until you will have a smooth and slightly sticky dough.
- Grease a large bowl, form a ball with the dough, and place it inside.
- Cover the bowl with plastic wrap and let it rest in a warm environment for 2 hours or until doubled in size.
Shape the focaccia & proof
- Transfer the dough to a lightly floured surface.
- Gently fold the edges of the dough towards the center, then fold the top and bottom edges towards the center as well making a small rectangle.
- Lightly oil an 8,5 x 12,5 inches baking tray and place the dough on it.
- Gently press and flatten the dough with your hands until almost all the tray bottom is covered. Cover with plastic wrap and let the dough rest for 1 hour in a warm environment.
- While the dough is resting, mix all ingredients of the brine and set aside.
Bake
- Preheat your oven to 440°F (225°C).
- Use your fingertips or knuckles to make the classic little dimples on the focaccia.
- Pour the brine all over the surface. Distribute the olives on top and sprinkle with dried oregano.
- Bake for 15 minutes or until the top turns a lovely golden brown color and the bottom feels dry and crunchy.
- Remove the focaccia from the pan and place on a cooling rack for 10 minutes. Cut into squares and enjoy.
Notes
- For best results, use a kitchen scale to measure the ingredients.
- This focaccia con le olive uses a small amount of yeast, thus it needs long proofing times.
- To proof your dough when it’s cold, use your oven as a proofing box. Turn on the oven light about 30 minutes before making the dough. Then, place the bowl with the dough inside the oven—keep the oven off. The gentle warmth from the light will help the dough rise.