

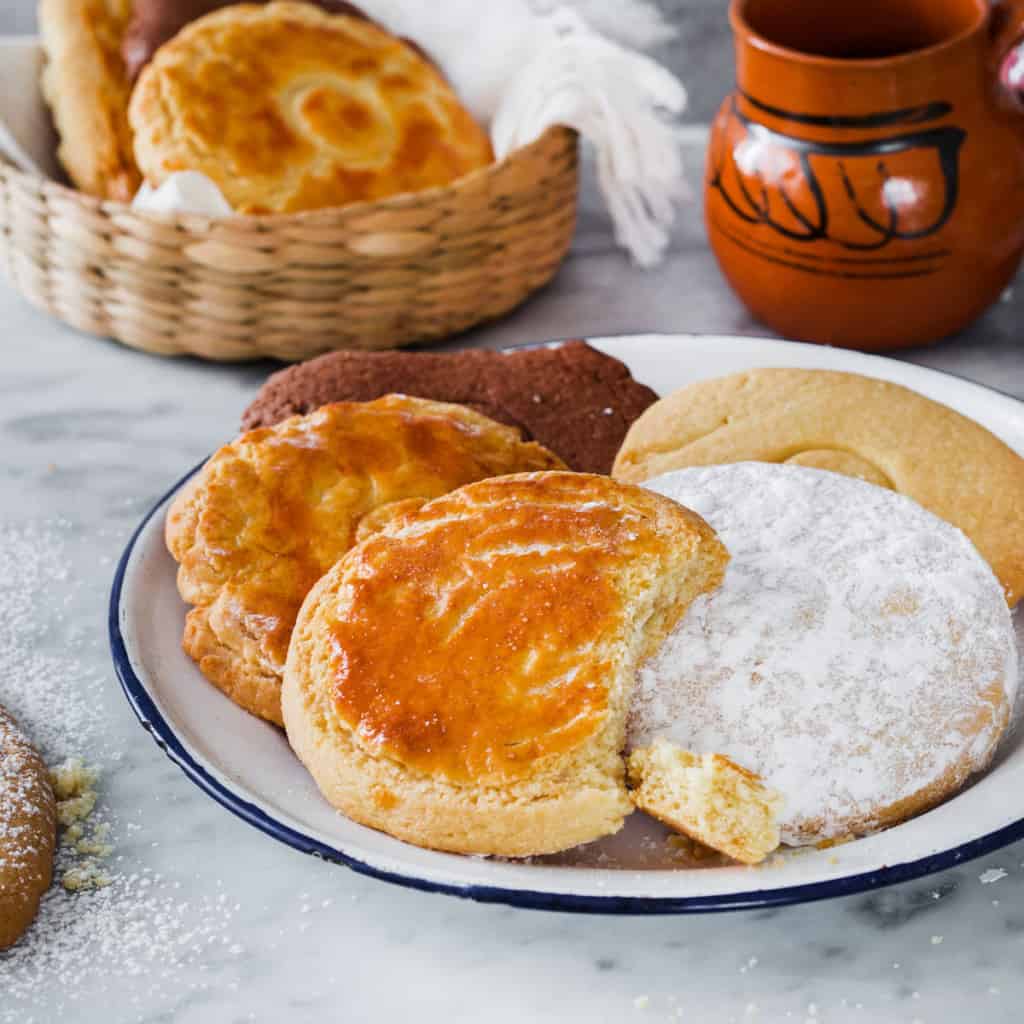
These fluffy and delicious conchas pan dulce are exactly like the ones found at Mexican panaderías. A brioche-like sweet bread perfect to enjoy with coffee, milk, or hot chocolate. Learn how to make them at home with this step-by-step recipe!

Conchas pan dulce is a type of sweet bread from Mexico. The name concha translates to “seashell” in English, and describes the characteristic shell-like pattern that is displayed on the top of this popular bread.
The recipe belongs to the category of pan dulce which is a wide variety of baked goods that are sweet in flavor and often enjoyed as breakfast or dessert in Mexico.
Conchas are made with a yeast dough prepared with flour, butter, eggs, sugar, and milk. The dough is placed to rise before being portioned into individual rounds, and then a shell pattern is created with sugar paste and placed on top.

Ingredients
- 3 3/4 cups all-purpose flour (about 500g)
- 2 1/2 teaspoons of instant yeast (7g)
- 3 small eggs (100-110g)
- 1/2 cup butter, softened (100g)
- 3/4 cup sugar (150g)
- 1/2 cup whole milk (120ml)
- 1 teaspoon vanilla extract
- 1/4 teaspoon table salt.
For the sugar topping:
- 1 cup flour (125g).
- 1/2 cup shortening or butter (100g).
- 1 cup powdered sugar (100-110g).
- 2 tablespoons cocoa powder (5g).
- Food coloring (as needed).
How to Make Conchas
Make the dough & proof
Sift the flour and place it in the bowl of a stand mixer. Add sugar, yeast, and salt. Mix to combine.
With the mixer running at medium speed, add the butter, eggs, and vanilla extract. Pour the milk and knead over medium speed until you have a smooth and elastic dough that is slightly sticky when you touch it.

Lightly flour a working surface, place the dough, and shape it into a ball. Slightly butter a large bowl and place the ball inside.

Cover the bowl with plastic wrap and with a clean kitchen towel. Place the bowl in a warm environment.
Top Tip: Turn the oven lights and place a small bowl with hot water inside. This will create a perfect warm and humid environment to proof the dough.
Allow the dough to rest for 1-2 hours or until it doubles in size.

Make the topping
While the dough is proofing, prepare the topping. Place the shortening in a medium bowl and use a spatula to soften it.
Add the powdered sugar and flour, then use your hands to combine into a soft paste.


Divide the paste into 3 equal parts. Slightly flour your working surface and roll a little bit two of the parts.
Add the cacao powder to one of the parts and use your hands to combine it. To the other part, add a few drops of food coloring until you achieve your desired hue.

Wrap all three parts of the paste and place in the fridge until needed.
Shape the bread
Flour your working surface and transfer the dough. Lightly punch it to remove excess air and shape a ball.
Divide the dough ball into 12 equal pieces — about 2.8 ounces (80 grams) each.

Lightly flour your hands, take a piece of dough, and using your thumb and fingers, gently pinch the edges of the dough towards the center, rotating the dough as you go.

Place the pre-shaped dough ball seam-side down on the floured surface.
Cup your hand over the dough and move your hand in a circular motion on the surface, gently pressing down on the dough to create a smooth, round shape.


Repeat until you use all the dough. As you make them, place the pieces onto two greased baking sheets, making sure each piece is 2 inches apart from each other.

Top & decorate
Remove the sugar paste from the fridge and divide each part into 4 equal parts to obtain 12 pieces.
Take one piece and quickly shape it into a ball. Place the ball between two plastic sheets and press it with a heavy dish to form a disc about 3.5 inches in circumference. Repeat with all pieces of sugar paste.

Tip: You can do this step using your tortilla press.
Carefully grease the top of a ball with a little bit of butter. Take one disc of sugar paste and cover the rounded dough, pressing down lightly to help adhere it to the surface. Repeat to cover all dough balls.

Using a sharp knife or a bench scraper, gently score the top of the paste topping in the shape of a shell.
Start by making an arc in the middle, then create curved lines on each side of the arc to resemble the seashell pattern.
Tip: If you have a concha cutter, you can use it to press the pattern into the dough instead of using a knife.

Cover with a kitchen towel and allow them to rest in a warm environment for 1-2 hours or until lightly puffed.
Note: The dough won’t double in size but you’ll notice it raised because the sugar paste lines will be slightly separated.

Bake
Preheat your oven to 325°F/162°C. Bake the sweet bread for 18-20 minutes or until lightly golden.

Once baked, carefully remove the conchas from the sheet and place them on a wire cooling rack.
Allow to reach room temperature and enjoy with Mexican hot chocolate!

Baking Notes & Tips
- Consider using a kitchen scale to measure the ingredients.
- Properly mix the dough until it’s well combined and smooth, but be careful not to overmix. Overmixing can lead to tough bread.
- Give the dough enough time to rise. This allows the yeast to ferment the dough, developing flavor and creating a light, airy texture.
- The sugar paste for making the topping should have the consistency of play dough, if necessary, adjust the consistency by adding more shortening or sugar.
- Allow the bread to cool on a wire rack after baking. This helps prevent the bottoms from becoming soggy.
- I usually bake one batch of conchas at a time but if you want to bake two sheets at once, just make sure to rotate them after 10 minutes, moving each sheet from bottom to top.

Recipe FAQ
What does concha bread taste like?
A Concha is sweet but not overly so, it also have a slightly buttery taste, and depending on the recipe it might include other flavors like vanilla, strawberry, or cocoa.
Why are my conchas dense?
There are 3 main factors to especially pay attention to and prevent tough or dense texture on this Mexican sweet bread:
– Make sure your yeast is fresh and active, and follow proper proofing procedures.
– The dough should have a soft and slightly sticky consistency. If the dough is too dry, the conchas can turn out dense.
– Make sure your oven is properly preheated to the recommended temperature.
How to store?
This sweet bread can last up to 5 days stored at room temperature. Place it in an airtight container or resealable plastic bag. Be gentle when placing it in the container to avoid damaging the topping.
You can also freeze it for up to 2-3 months.
More Pan Dulce Recipes
Have you tried this Mexican pan dulce recipe? Leave a comment below to let us know how it turned out! Also, join our community of readers by following us on Facebook, Pinterest, YouTube, and Instagram.
Video

Conchas Pan Dulce
Equipment
- stand mixer
- 2 Baking trays
Ingredients
- 3 ¾ cup all-purpose flour (+ extra for dusting)
- ¾ cup white sugar
- ½ cup milk
- 2 ½ teaspoons instant dry yeast
- ½ cup unsalted butter (softened)
- 3 small eggs
- 1 teaspoon vanilla extract
- ½ teaspoon salt
For the topping
- 1 cup all-purpose flour
- ½ cup shortening (or butter)
- 1 cup powdered sugar
- 2 teaspoons cacao powder (optional)
- Organic food coloring gel (optional, any color you prefer)
Instructions
Make the dough & proof
- Sift the flour and place it in the bowl of a stand mixer. Add sugar, yeast, and salt. Mix to combine.
- With the mixer running at medium speed, add the butter, eggs, and vanilla extract.
- Pour the milk and knead over medium speed until you’ll have a smooth, elastic, and slightly sticky dough.
- Flour a working surface, place the dough, and shape it into a ball. Grease a large bowl with butter and place the ball inside.
- Cover the bowl with plastic wrap and place it in a warm environment (read notes).
- Allow the dough to rest for 1-2 hours or until it almost doubles in size.
Make the topping
- Place the shortening in a medium bowl and use a spatula to soften it.
- Add powdered sugar and flour, then combine with your hands to achieve a soft paste.
- Divide the paste into 3 equal parts. Slightly flour your working surface and roll a bit two of the parts.
- Add the cacao powder to one of the parts and use your hands to combine it. To the other part, add a few drops of food coloring until you achieve your desired hue.
- Wrap all three parts of the paste and place in the fridge until needed.
Shape conchas
- Flour your working surface and transfer the dough. Lightly punch it to remove excess air and shape it into a ball.
- Divide the dough ball into 12 equal pieces.
- Lightly flour your hands, take a piece of dough, and using your thumb and fingers, gently pinch the edges of the dough towards the center, rotating the dough as you go.
- Place the pre-shaped dough ball seam-side down on the floured surface. Cup your hand over the dough and move your hand in a circular motion on the surface, gently pressing down on the dough to create a smooth, round shape.
- Repeat until you use all the dough. Place the pieces onto two greased baking sheets, making sure each piece is 2 inches apart from each other.
Top & decorate
- Remove the sugar paste from the fridge and divide each part into 4 equal parts to obtain 12 pieces.
- Take one piece and quickly shape it into a ball. Place the ball between two plastic sheets and press it with a heavy dish to form a disc about 3.5 inches in circumference. Repeat with all pieces of sugar paste.
- Carefully grease the top of a ball with a little bit of butter.
- Take one disc of sugar paste and cover the rounded dough, pressing down lightly to help adhere it to the surface. Repeat to cover all dough balls.
- Using a sharp knife or a bench scraper, gently score the top of the paste topping in the shape of a shell.
- Cover with a kitchen towel and allow them to rest in a warm environment for 1-2 hours or until lightly puffed.
Bake
- Preheat your oven to 325°F/162°C. Bake the sweet bread for 18-20 minutes or until lightly golden.
- Once baked, carefully remove the conchas from the sheet and place them on a wire cooling rack.
- Allow to reach room temperature and enjoy.
Notes
- Be careful not to overmix the dough. Overmixing can lead to tough bread.
- Give the dough enough time to rise. This allows the yeast to ferment the dough, developing flavor and creating a light, airy texture.
- Turn the oven lights and place a small bowl with hot water inside, then place the dough there to proof.
- The topping for conchas should be of a crumbly, streusel-like consistency. If it’s too dry, add a bit more butter or shortening; if too wet, add a little more flour.
- Allow the concha bread to cool on a wire rack after baking. This helps prevent the bottoms from becoming soggy due to trapped steam.


I made these and everything went great! They even tasted great. However, I had trouble with making my topping. It got very crumbly and did not want to stay together. Any tips on this?
Thank you for trying my conchas! The topping can get crumbly if it’s too dry, if butter is not enough, add a 1-2 teaspoons of water and knead until it holds together nicely.
Omigosh these turned out so beautifully! Thank you for the recipe <3
Thank you for trying my recipe! Happy you liked it :)
Can you freeze the dough if you don’t want to make all 12 concha’s? If yes, at what point in process? Thank you!
Yes, you can freeze the dough! It’s best to freeze it after the first rise. Simply shape the dough into individual conchas or a ball, wrap it tightly in plastic wrap, and place it in a freezer-safe bag or container. When you’re ready to bake, thaw it overnight in the fridge, then let it come to room temperature before proceeding with the second rise and shaping. Enjoy!
Just made these and they were so good. Best eaten the day of so soft and perfect. They are still good the next day but nothing compares to them being fresh. These are way better than store bought and worth the effort. I used butter in mine and reduced the sugar and still came out amazing!
I was worried they wouldn’t be good since they take all day to make but boy was i surprised. They have a hint of sweetness and a donut like texture. I wish there was a less time consuming version though but definitely awesome goodness.
I had this when I visited Mexico and have been longing for it again! This nailed it!
Omg these little treats are so gorgeous and look so delicious too!! This will be a fun baking project to do with my kids this weekend – can’t wait to try this recipe!
These conchas are WORTH IT! Delicious and I definitely impressed my friends with the presentation. Thank you!
I love these, but I never knew how easy they were to make! Going to be having them on the reg from now on!
We used to get them when we lived near LA. These are even better than I remember!
This is so perfect with my coffee! I really enjoyed it! Thanks for the recipe!
Your conchas are beautiful! Thanks for sharing all the tips – I hope to get my topping to look as pretty!
Not sure what went wrong but I followed the recipe word for word, I even watched the video multiple times. My dough was not sticky, duper dry, did not over mix, my kitchen was warm. Ugh, please help.
These look so light fluffy and delicious. I love that you chose to add color to them. It’s just such a pretty, sweet bread.
Oh my gosh these little cookies are so incredibly beautiful and nice and fluffy. So delicious and authentic!
Wow. Always loved buying these at the local store, and now we made them our selves! These disapeared so fast!!
These are so beautiful and were so delicious! You instructions were fool proof! Everyone loved them!
This is so soft and so yummy! Love it.
What a colorful and attractive bread. Kinda remind me the bread I see in Southeast Asian cuisines. This is perfect to serve with hot tea.
Love that I can make these instead of buying them at the bakery!
I had this every morning when we went to Mexico, it’s so good and I was craving them today so I made one! I didn’t expect them to turn out so good but they did! I enjoyed it with my morning coffee.
I’ve always wanted to make conchas. Thrilled with this recipe and how they came out. Thanks for the easy-to-follow instructions!
Thank you for the detailed recipe, it seems too easy to make these cute conchas and can’t wait to see how they turn out today (so far so good, I have the dough proofing now!).
The video helped a lot to see how the dough should be and also how to make the sugar paste.