

This homemade italian pasta recipe is all you need to start your way into the traditional italian cooking.
Our step-by-step recipe will show you the traditional way for making fresh pasta, how to cut it and how to store it in case you want to make it ahead of time.
Authentic Italian Egg Pasta
Fresh egg pasta is a very popular type of pasta in Italy that is prepared with two basic ingredients: Flour and fresh eggs. Starting from here, many versions are made, like green spinach pasta, beetroot pasta, etc.
But this post is all about the regular homemade italian pasta recipe, so keep reading because I know that you’ll find many interesting info in this post.
About the flour
The texture of the pasta after cooking will depend on the type of flour you use. Normally all-purpose flour is used, but it is also common to use semolina.
A full dose of semolina flour will make the pasta a bit “rough” and more al dente, while using full all purpose flour will make the pasta a little softer.
Try different types of flour and combinations (50% -50%, 40-50, 30-70, etc) and go with the one that suits best for your taste.
The tools
Using a wood roller pin and an old wood surface for working the dough will help to give texture to the pasta. So, if you can, avoid using marble or too smooth surfaces.
How To Cook Fresh Pasta – The italian way
- Water and salt are the only recommended ingredients for cooking pasta.
- It is better to let the pasta rest for 2 or 3 hours before cooking, to avoid that it falls apart as soon as it touches the boiling water.
- Use a large pot with enough water to cover the pasta well. Pasta should “swim” on water.
- To speed up the boiling time of the water, it is best to cover the pot and not add the salt at the beginning.
- The water must boil before adding the pasta, if you put it before you run the risk that the pasta will overcook and fall apart.
- As soon as the water begins to boil, add the pasta and add the salt. Do not cover the pot again as it may cause the water to leak out or the pasta to overcook.
- Avoid mixing the pasta with rough movements because it could break it. It is enough to do it only once in a while to avoid sticking but always with smooth movements.
- Contrary to packaged pasta (dry pasta), fresh pasta for lasagna should not be cooked completely before preparing the lasagna, it will be enough to soak it for a few seconds in hot water.
- The cooking time depends on tastes and the thickness of pasta, I love my pasta al dente so I usually leave it for 3-4 min. but this works mostly with tagliatelle or long type pasta. Other types, like orecchiette, might need a little more time of cooking.
- If you want to stop the cooking quickly, just add a cup of cold water to the pot as soon as you remove it from the heat. Do not rinse the pasta with water as it loses a lot of flavor and texture.
How To Store
Fridge
Flour the pasta with semolina/flour, put it in a plastic container with a lid and place it in the refrigerator. It will last for two to three days.
Freezer
SHORT PASTA (tortellini, ravioli, orecchiette): Place pasta in a single layer on a tray or flat plate and freeze it for a few hours or until hard, then transfer the pasta to zipper bags and return them to the freeze where it will last for about 2 months.
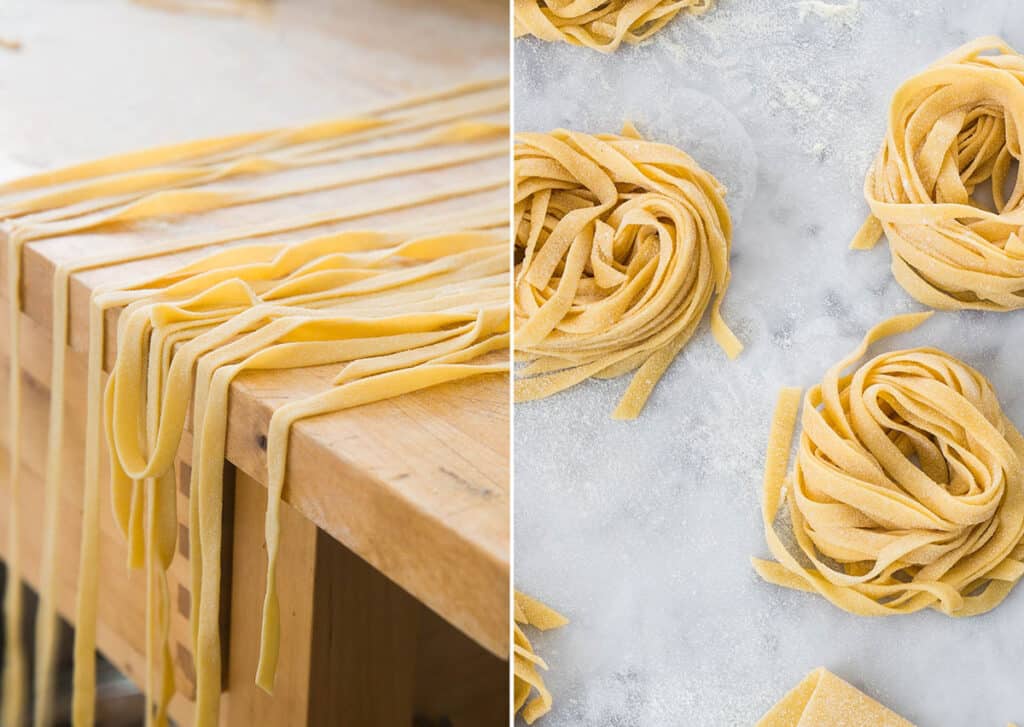
LONG PASTA (tagliatelle, spaghetti, tonnarelli): Flour pasta with semolina/flour, let it dry slightly (about 10 minutes), then form “nests” and place them separately in a single layer on a tray. Freeze until hard then transfer the nests to zipper bags and store in freezer for about 3 months.
Homemade Italian Pasta Recipe
Important: The ingredients list with the exact measurements can be found below, in the recipe card. Please take in mind that while I posted the measurements also in US cups, if you want better results, I strongly suggest to use a kitchen scale instead.
Place the flour in a mound on a working surface and make a well. Crack the eggs in the middle and add a pinch of salt. Start combining the ingredients with a fork.

Now use your hands and mix all the flour with eggs until fully incorporated. At the start you’ll notice the dough is very sticky, so use a spatula to pick up the dough that sticks to the working surface.
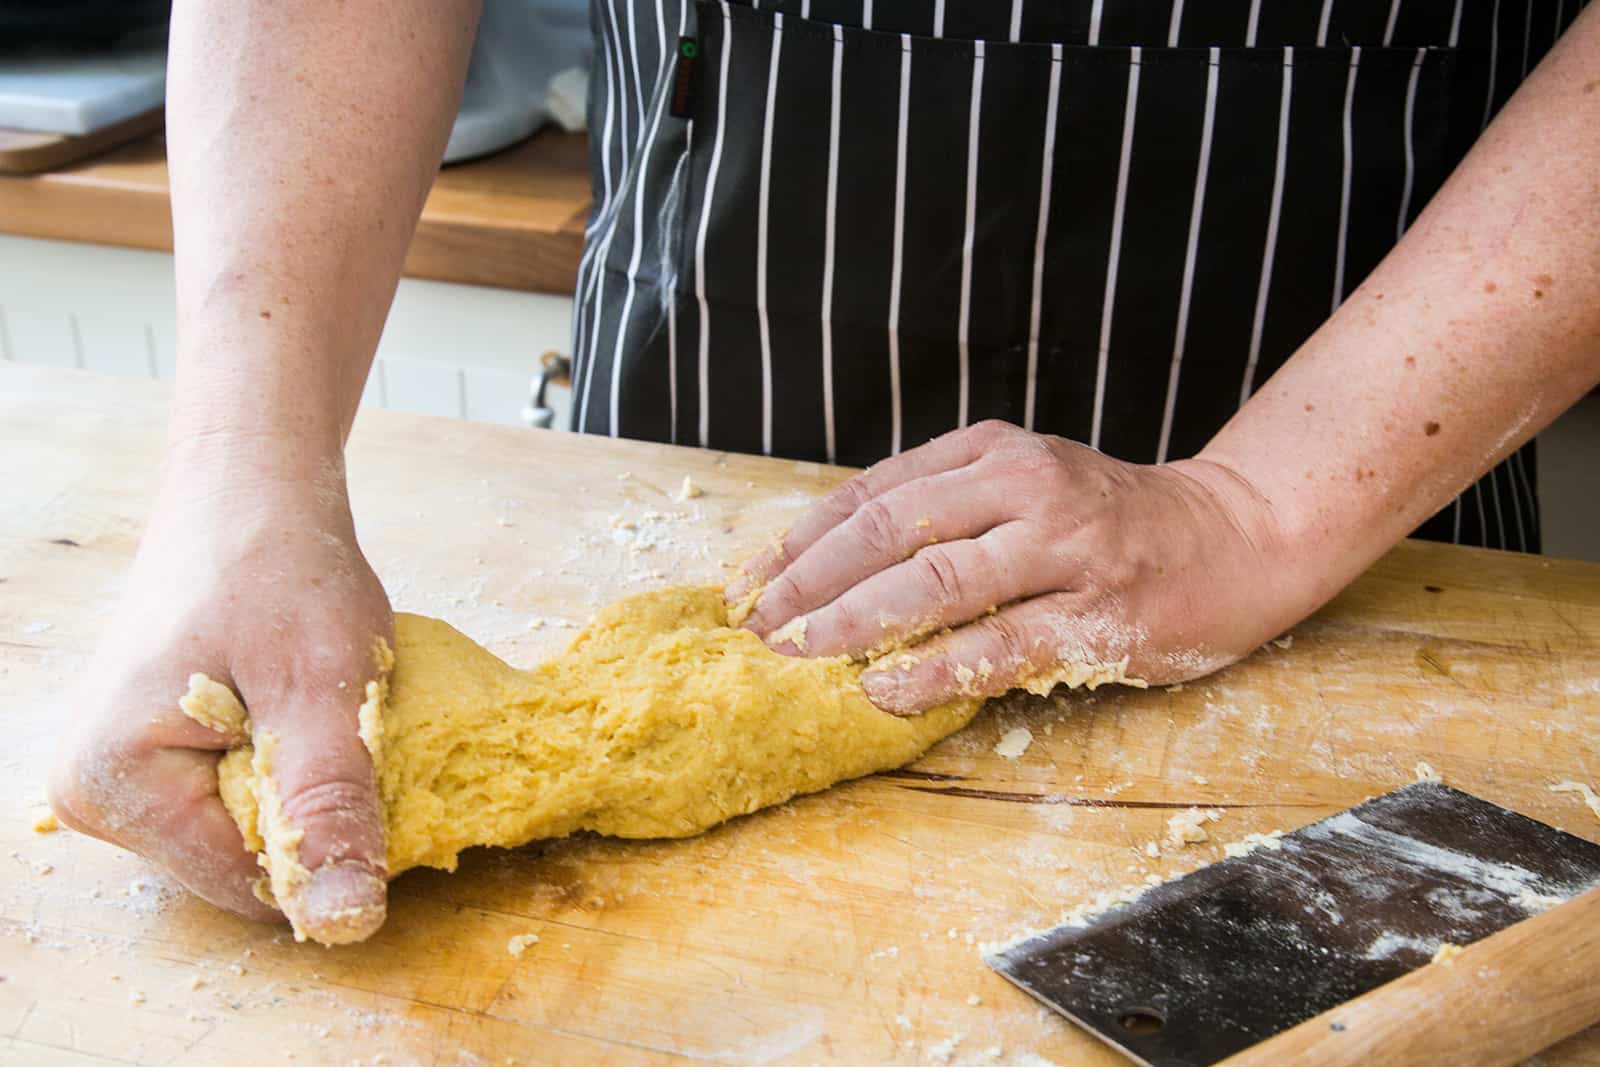
Keep kneading for about 10 to 15 minutes, if you notice the dough is too dry add a few teaspoons of water, or, if you feel the dough too sticky even after 10 minutes of kneading, add a little bit of flour. Humidity and temperature in your kitchen may vary, so adjust the dough as you go.
When the dough will be smooth and elastic, make a ball and cover it with cling film or a damp kitchen towel. Leave it to rest between 15 to 20 minutes to develop the gluten structure.
How To Roll The Dough
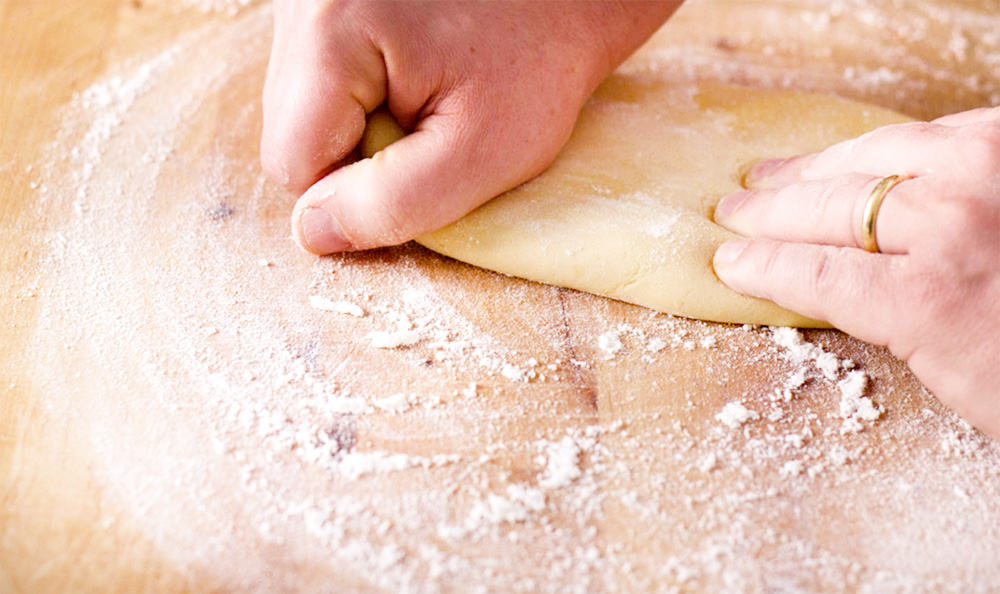
First flatten the dough a little with your hands, then use a rolling pin to start working the dough.
To roll the dough, the best way is to press the lower part of the dough sheet with one hand and with the other run the roller outwards, take in mind that when it is pressed outwards a strong pressure must be made, while when the roller returns towards inside, the pressure must be less.
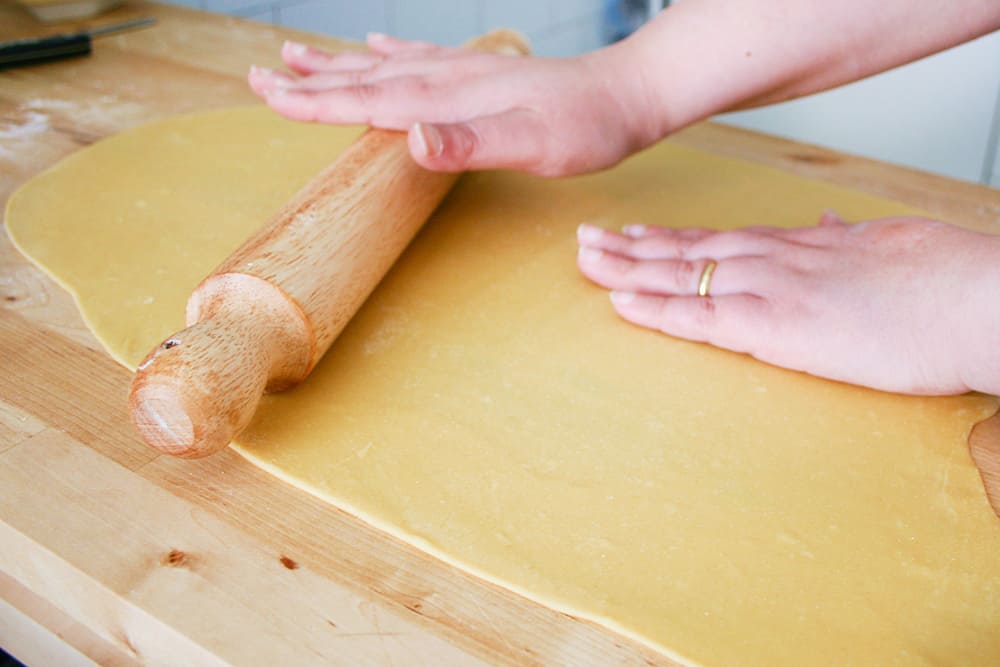
Continue rolling the dough until you’ll achieve a sheet of the desired thickness (it depends what type of pasta are you making). For example, tagliatelle can be a little more thick while making sheets for lasagna or ravioli could need a very thin rolled dough.
How To Cut Fresh Pasta Dough
Now we will move on to the most fun part: The cut. Here it depends on what type of pasta you want to make, whether it is short or long pasta, stuffed, etc.
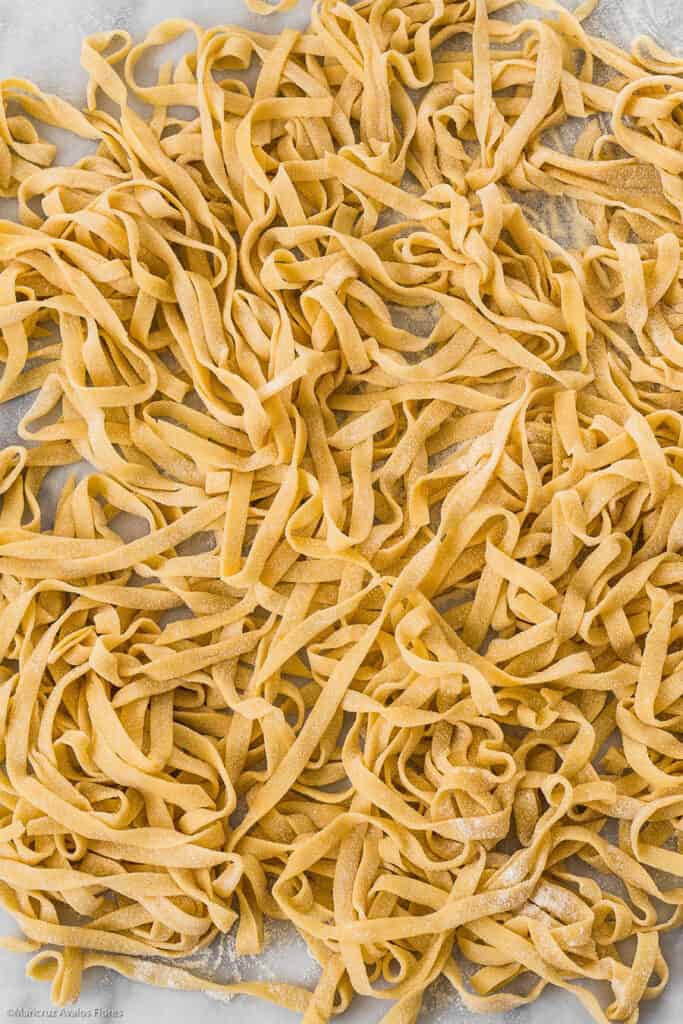
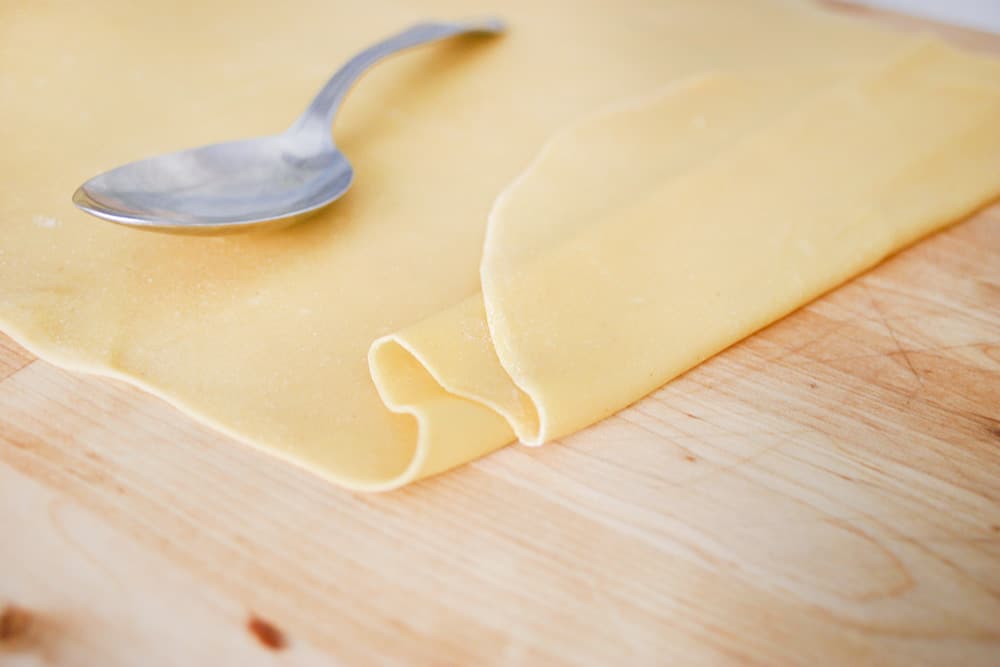
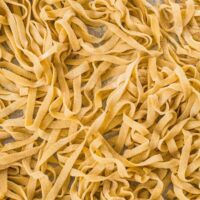
Long format pasta: Flour the pasta sheet very well on both sides. Then fold it in two towards the middle, repeat the folding until you’ll obtain a narrow rectangle.
Cut it into stripes as show in the pictures below, depending what you’re making: 0,10″/2mm for tagliolini, 0,20″/5-6mm for tagliatelle and 0,80″/1.5-2cm for pappardelle.

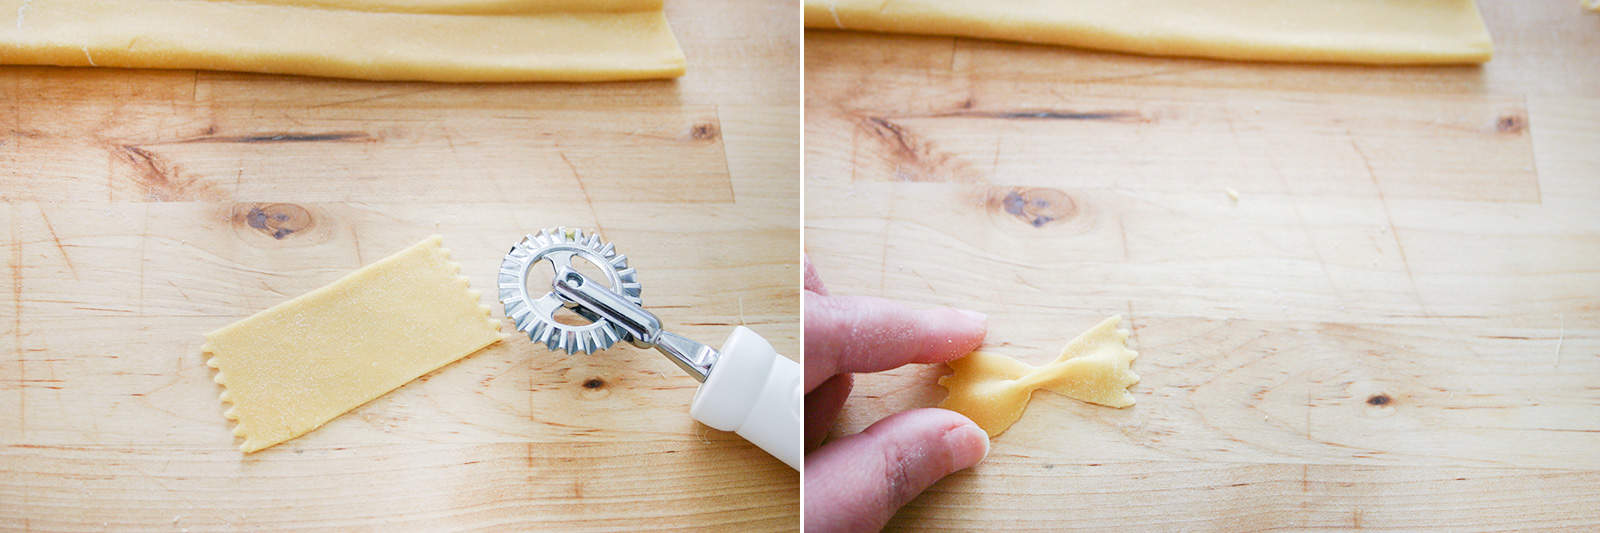
Farfalle, farfalline
Cut a rectangle of 1,70″ x 1″ (4.5cm x 2.5cm). Cutting the narrowest side with a serrated cutter. Wet lightly your fingers with water and then press in the center to make a bow.
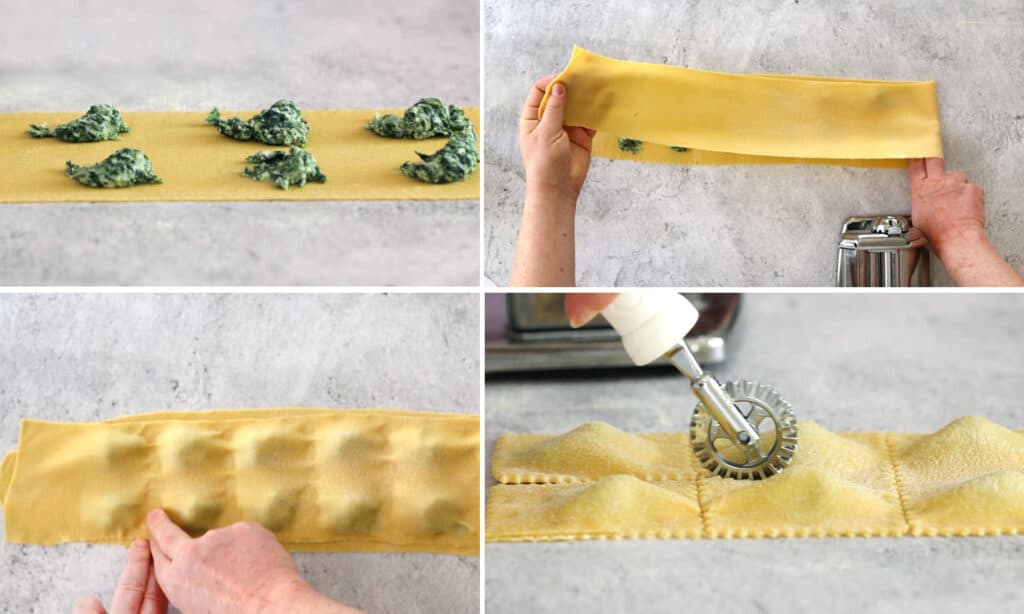
Ravioli:
Cut the dough into long sheets of about 32×7″ (80x18cm). Place small mounds of the filling on one half of the sheet, leaving about 1.20″ (3cm) of empty space between them.
Place the other half of the sheet on top covering the filling and seal with your fingers. Cut ravioli with a cookie or fluted cutter, a knife or even a glass into squares or circles.
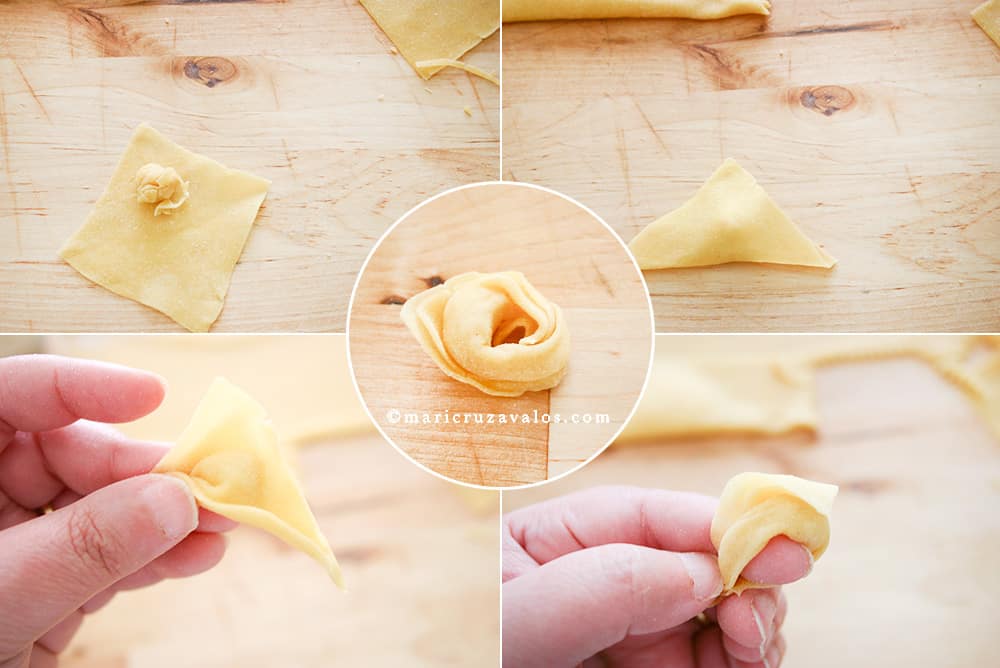
Tortellini:
Cut a 1,5×1,5 inch (4x4cm) square. Put the filling in the middle. Close in half to make some sort of triangle, then press a little with your fingers in each corner. Roll it around the index finger giving it the shape of a ring.
Trofie:
This type of pasta is from Genoa and is mostly used to eat with pesto. The name is from the genoese dialect: strufuggiâ – strofinare (italian) = rub (english).
First, make a small ball the size of a pea. Then rub it between your palms like if you’re washing your hands.

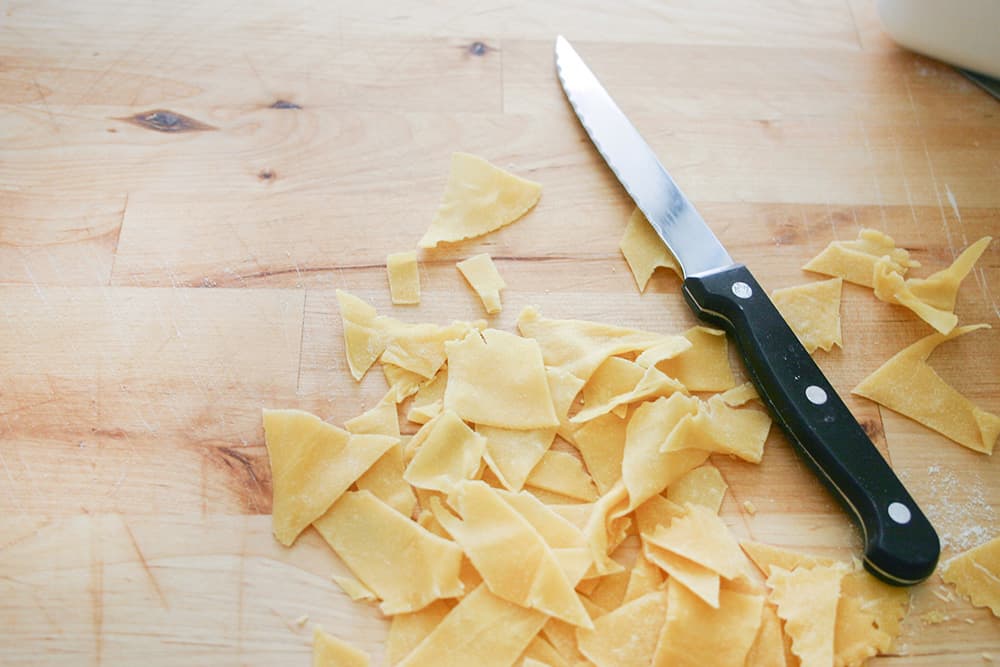
What to do with the leftovers
If you ask yourself: And what do I do with the leftovers? The answer is Maltagliati!, they are delicious with beans and a drizzle of olive oil or with tomato and basil juice. The choice is up to you.
Homemade Italian Pasta Recipe
Ingredients
- 400 gr (2 ⅔ cup) all purpose flour, or semolina
- 4 medium eggs
- Salt
Instructions
- Place the flour in a mound on a working surface and make a well.
- Crack the eggs in the middle and add a pinch of salt. Start combining the ingredients with a fork.
- Now use your hands and mix all the flour with eggs until fully incorporated. At the start you’ll notice the dough is very sticky, so use a spatula to pick up the dough that sticks to the working surface.
- Keep kneading for about 10 to 15 minutes, if you notice the dough is too dry add a few teaspoons of water, or, if you feel the dough too sticky even after 10 minutes of kneading, add a little bit of flour. Humidity and temperature in your kitchen may vary, so adjust the dough as you go.
- When the dough will be smooth and elastic, make a ball and cover it with cling film or a damp kitchen towel. Leave it to rest between 15 to 20 minutes to develop the gluten structure.
ROLL THE DOUGH
- First flatten the dough a little with your hands, then use a rolling pin to start working the dough.
- To roll the dough, the best way is to press the lower part of the dough sheet with one hand and with the other run the roller outwards, taking in mind that when it is pressed outwards a strong pressure must be made, while when the roller returns towards inside, the pressure must be less.
- Continue rolling the dough until you’ll achieve a sheet of the desired thickness (it depends what type of pasta are you making). For example, tagliatelle can be a little more thick while making sheets for lasagna or ravioli could need a very thin rolled dough.
This homemade italian pasta recipe is Italian-approved! My husband is Italian and I wanted to cook authentic pasta for him and he loved it! Thank you for your thorough recipe, definitely helps me who has no idea what I’m doing most of the time.
I am a big fan of yours and I appreciate the way you have explained the things in a step-by-step manner it really makes understanding very easier and even I tried making this at home I could only make this possible because of you thank you so much.
Thank you for your kind words. Hope you enjoy fresh pasta!